

How To Change The Color Of A Word Document
Microsoft Word is the premier word processor and certificate creator in the earth. Millions of people use it for formal documents – resumes, theses, reports, and contracts. But you can also utilize information technology for making simple graphic designs. All you need is a pop of color! Check out this guide below to get started.

Now, you have two basic options to add color to your Discussion documents.
two Methods to Alter Background Color in Microsoft Word
- Using the Default Standard or Theme Colors.
- Using a Custom Color You lot tin Cull from a Spectrum.
This guide walks you through both these methods. It also covers using gradients, textures, patterns, and pictures equally backgrounds.
Without further ado, let's get to it!
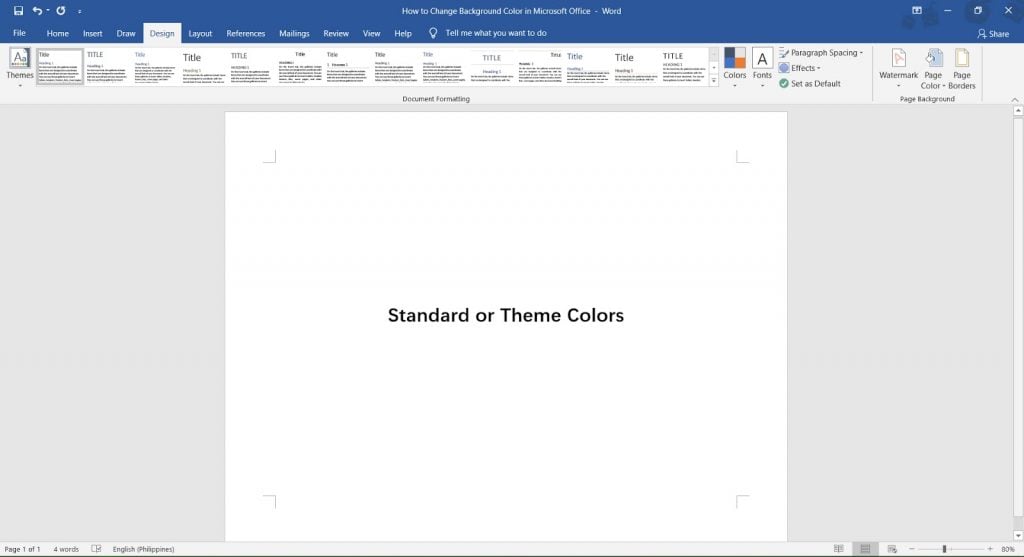
Method 1: Using the Default Standard or Theme Colors.
If you don't have a detail color in mind, you can conveniently choose from two sets of colors provided in MS Word. These are the Standard Colors and the Theme Colors.
Standard Colors are the constant default options, while Theme Colors are linked to the theme of the MS Word document. This means that a change in the document theme likewise changes the Theme Colors. The Standard Colors remain the same. Both these options provide users with consistency in the colors they use.
Here'due south how they work.
Stride ane: Open up your MS Discussion file.
Permit'southward start with opening the Word file yous want to work on. If you don't take one, feel gratis to make a re-create of the document used in this guide. Any Give-and-take file volition practice.
Don't worry about altering the content of your file, equally nosotros'll just be working on the background. In any case, you can always undo whatever changes by pressing the CTRL + Z keys on your keyboard.
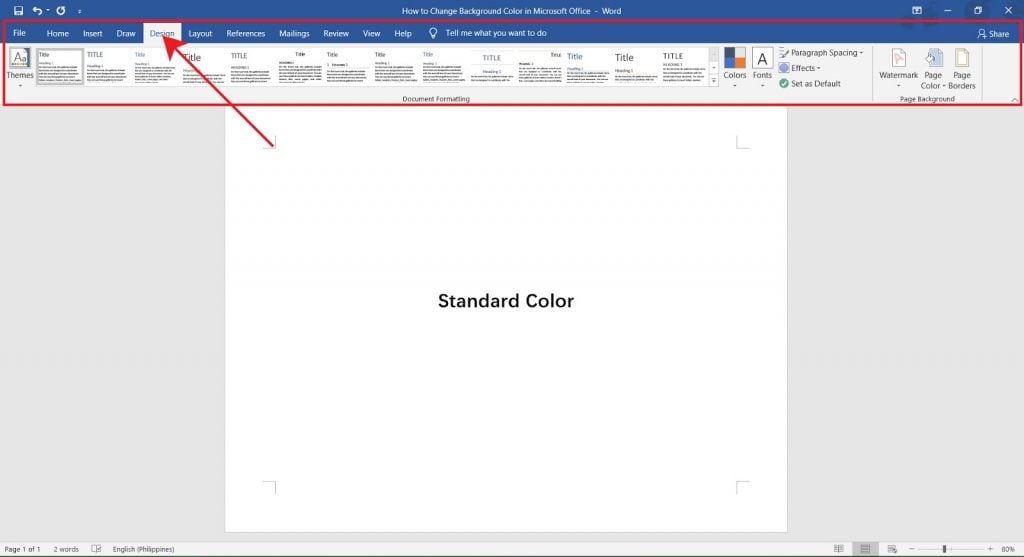
Step 2: Go to the Design Tab.
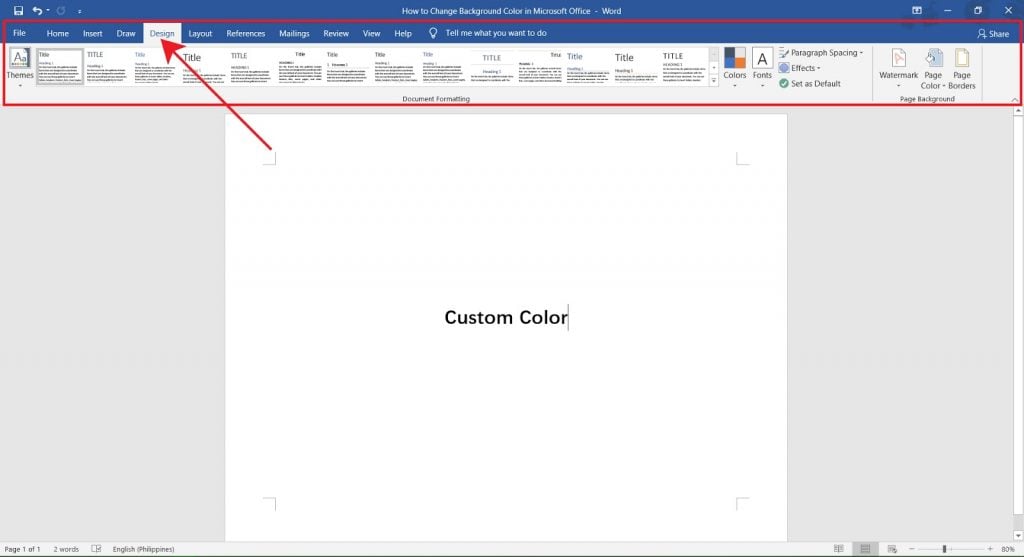
Once you've opened your file, look upwards to the row of tabs, which is chosen the Ribbon. The Ribbon is indicated in the paradigm beneath as the area in the red rectangle. Go ahead and click on the Design tab. The blueprint options should now announced.
Footstep 3: Open the Page Color Menu.
Now that y'all're on the Design tab, plow your attention to the right side of your screen. Tap on Page Color. That will open a drib-down menu of options you can choose from.

The grid of colors are Theme Colors. These change as the document theme changes. The row of colors beneath the filigree are Standard Colors. You can notice more standard colors if y'all click on More than Colors. Get ahead and pick a color.
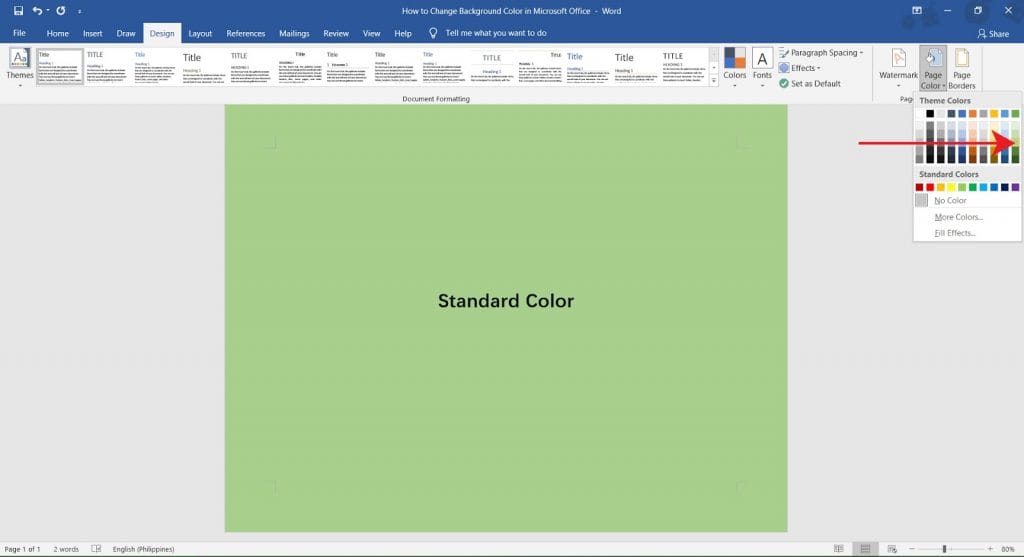
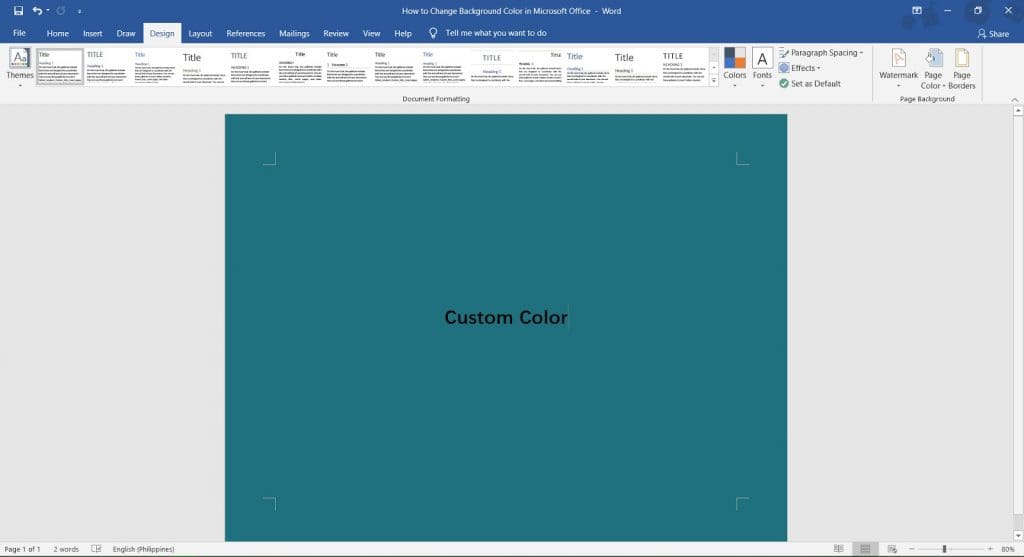
Voila! You have just changed the background colour of your MS Give-and-take document.
Method ii: Using a Custom Color You can Choose from a Spectrum.
You now know how to alter the background colour of your Word file. Just what if none of the standard colors are to your liking? That's perfectly alright. With this method, you lot have free reign to choose your background color from a spectrum.
Here's how you tin can modify your background to a custom colour.
Step one: Open up your MS Word file.
Once again, permit's beginning with opening the Word file you desire to work on. Any Discussion file will do. If you lot don't take ane, feel gratis to make a copy of the certificate used in this guide.
Don't worry about accidentally altering the contents of your file, every bit nosotros'll but be working on the background. In whatever instance, you tin ever undo any changes by merely pressing CTRL + Z keys on your keyboard.
Step 2: Go to the Blueprint Tab.
Once you lot've opened your file, expect up to the row of tabs which is chosen the Ribbon. The Ribbon is indicated in the image below as the expanse in the cherry-red rectangle. Go ahead and click on the Design tab. The design options should now announced.
Step 3: Open up the Page Color Menu.
Now that y'all're on the Design tab, turn your attention to the right side of your screen. Tap on Page Colour. That volition open a drop-downward menu of options y'all can choose from. Click on More Colors.
Step 4: Choose a Custom Color
In the More than Colors window, at that place are 2 tabs. Click on the Custom tab. You should be able to see a box of colors, and a bar to its correct. Click and drag inside the box to get your desired hue and saturation. Now look to the bar. Moving the slider up and downward adjusts the effulgence of your color.
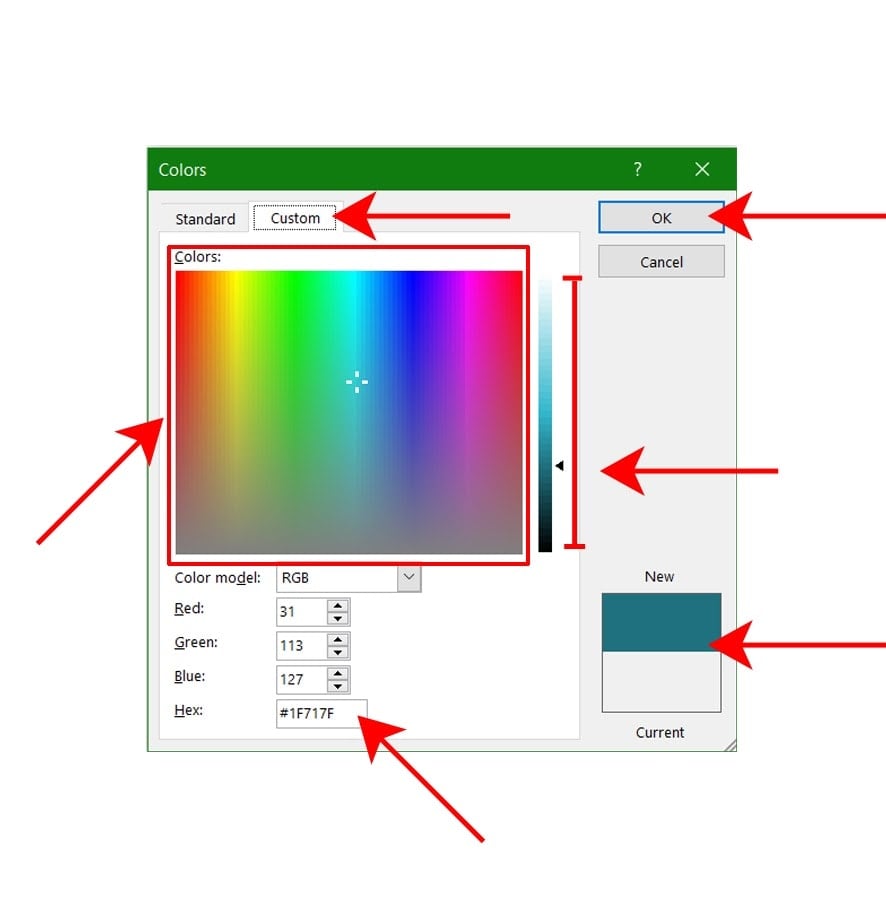
Too, notice that box on the bottom labeled Hex. Hex is a system of codes that represent colors in the RGB format. One lawmaking represents 1 color. This allows you to easily replicate any custom color you have used earlier. All you have to do is blazon in the color code into the box. In this illustration, the Hex code is #1F717F.
Once you're satisfied with the colour you've called, click OK to apply it to your background.
Other Backgrounds
Aside from solid colors, MS Word also has other options you tin can use to change your groundwork. Yous tin can put a slope, texture, design or picture as the background of your document. Each of these options have their own complexities, but we made certain to include but the basics in this guide to keep it elementary. Just follow these steps!
To go started on any of these other backgrounds, first go to your Design tab. Open the Page Color menu and click on Fill Effects.

Slope Background
A gradient is a gradual and smooth blending from ane color to some other. For MS Word, you tin can make a slope out of any two colors. Start with opening up the Fill Effects window, and click on the Gradient tab.
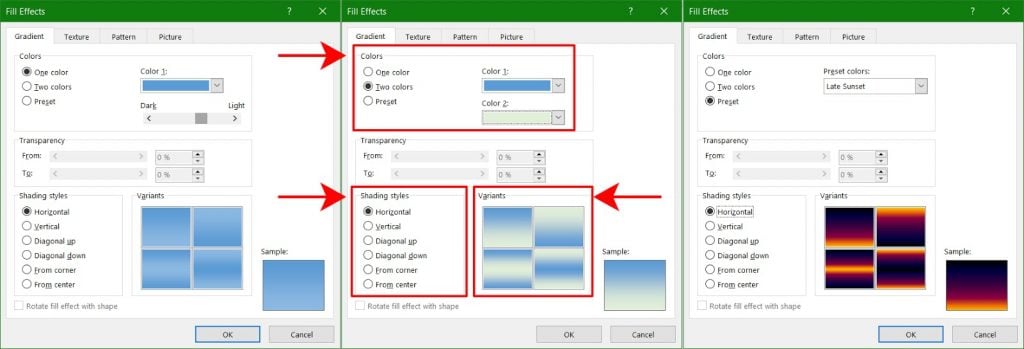
To go your gradient, in that location are 2 settings y'all demand to configure. These are the Colors and Shading Styles. Permit's get through each of them.
For your Colors, yous can choose between One Color, Two Colors, or a Preset combination of colors. A gradient blends at least two colors. If y'all cull One Color, your color will alloy with its own brightness. To make it darker, motility the slider to the left. Inversely, movement the slider to the right to go far lighter.
Shading Style changes the direction your colors alloy. Your options are Horizontal, Vertical, Diagonal Up, Diagonal Down, From Corner or From Center. Find the ane that works best for you.
Variants are four combinations made from your choice of colors and shading mode. Become alee and select your gradient. The minor Sample box allows you to verify your choice earlier you apply it to your groundwork.
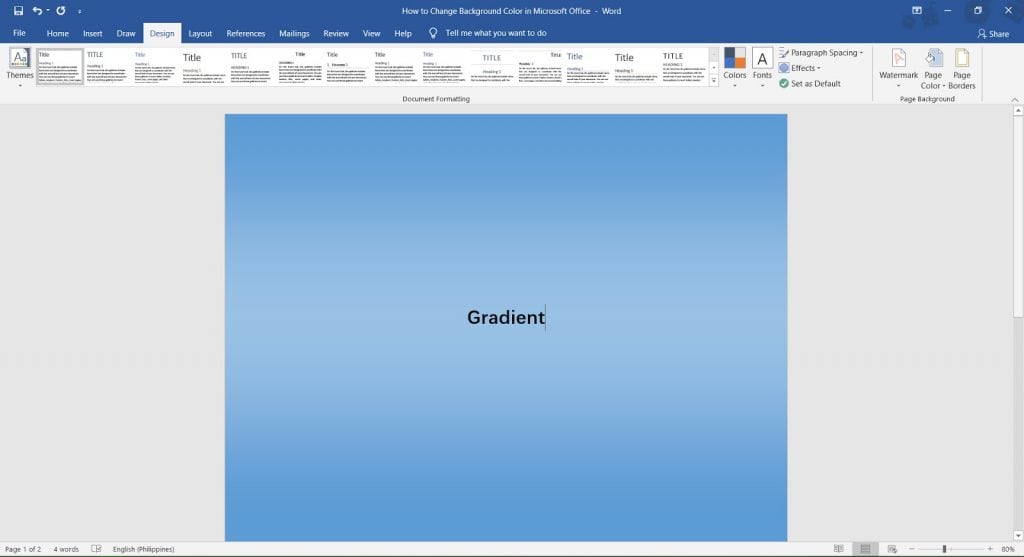
Congratulations! You've just made a slope background!
Textured Background
This option allows you to accept a texture equally the background of your document. This allows for more complex colors and shapes. There are default options yous tin choose from, but you besides take the selection to upload an image of the texture you lot want to use.
First, bring up the Fill up Effects window, so go on the Texture tab. Select a texture y'all prefer from the given choices. If none of them work for yous, click on Other Textures to upload your own preferred texture. Exist mindful of the image size. Images that are too large won't be uploaded.
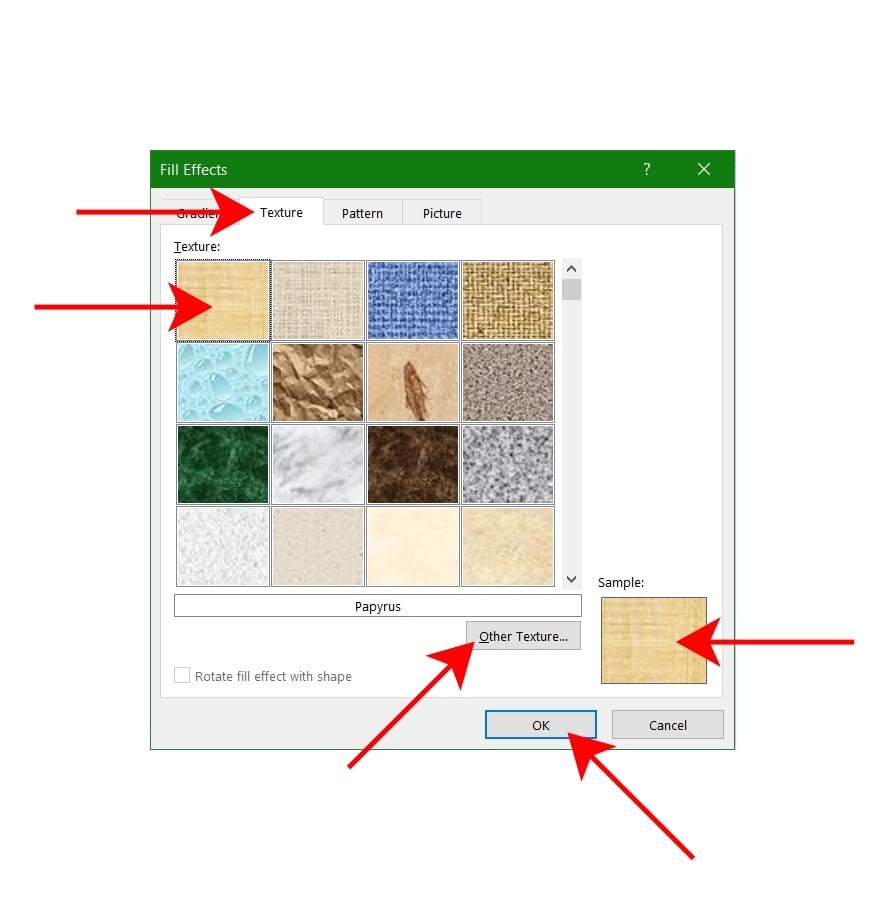
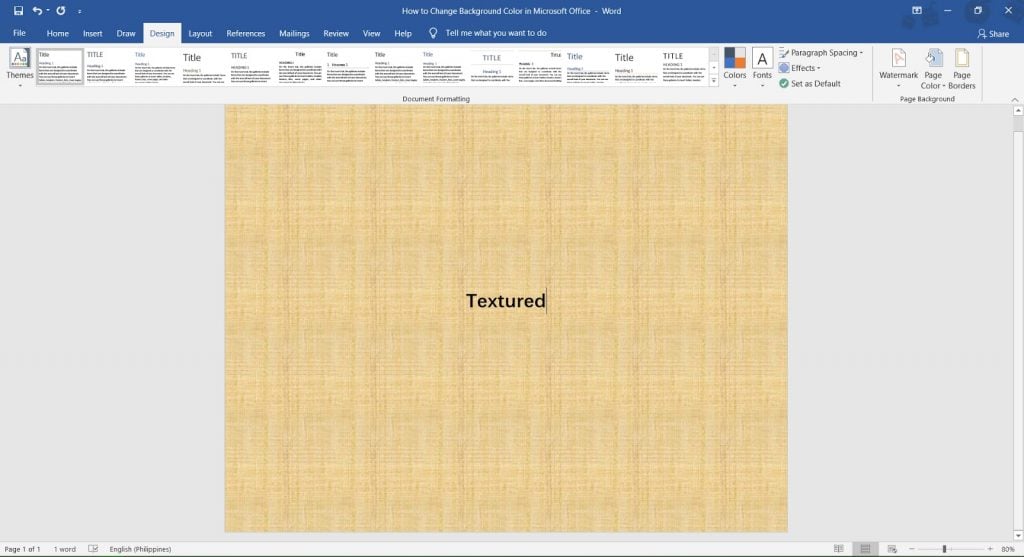
You lot've successfully applied a texture to your background!
Patterned Background
Sometimes, a skilful patterned background is all you need. Thankfully, MS Word gives yous a lot to cull from! Let'due south open upwards the Make full Effects window to go started, so go to the Design tab.
To make your pattern, y'all demand to configure three settings. The Pattern refers to the repetitive pattern itself. The Foreground changes the colour of the pattern. The Background is the color behind the design. Fool around with these three settings and run across the changes in existent-time on the Sample box on the bottom right.
One time you lot're satisfied with your pattern, click OK to apply it to your background.
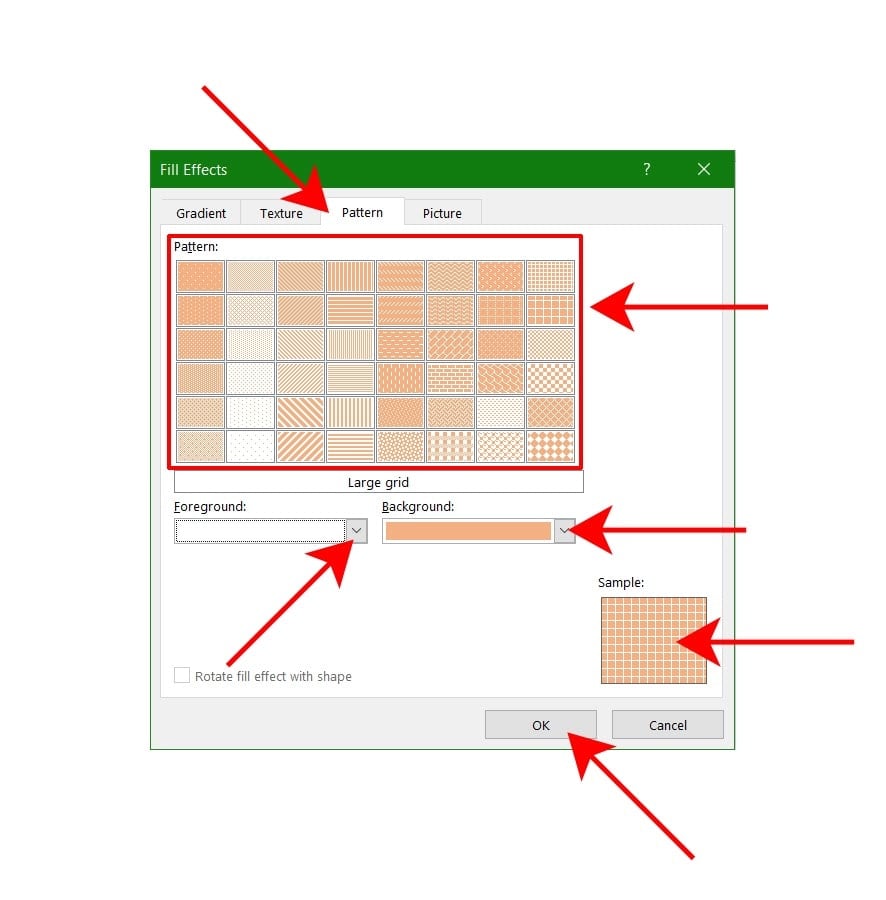

Great chore! Your patterned groundwork is ready to go.
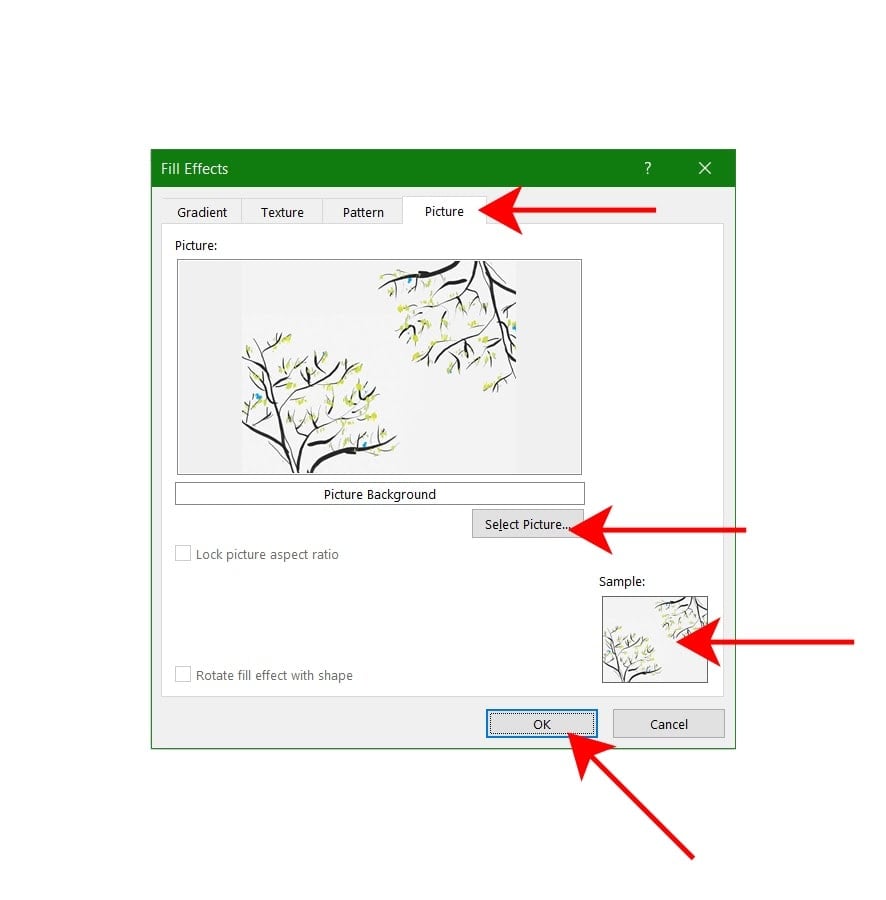
Picture Background
Yous tin use any picture equally a background for your document, however, the options to manipulate the picture are limited. You have to make sure that the movie you upload is the same size as your document page to accept the right fit. If your certificate is in letter of the alphabet size (8.5" x xi"), then make sure that the flick you upload is also in letter of the alphabet size.
Let's get to it. Open up up the Fill up Effects window, and click on Picture. Click on Select Pic to scan your device. Upload the picture you want to apply and verify that it's the correct film. If everything is set, click OK to employ the movie to your groundwork.

Done. Now you can use any picture equally a groundwork!
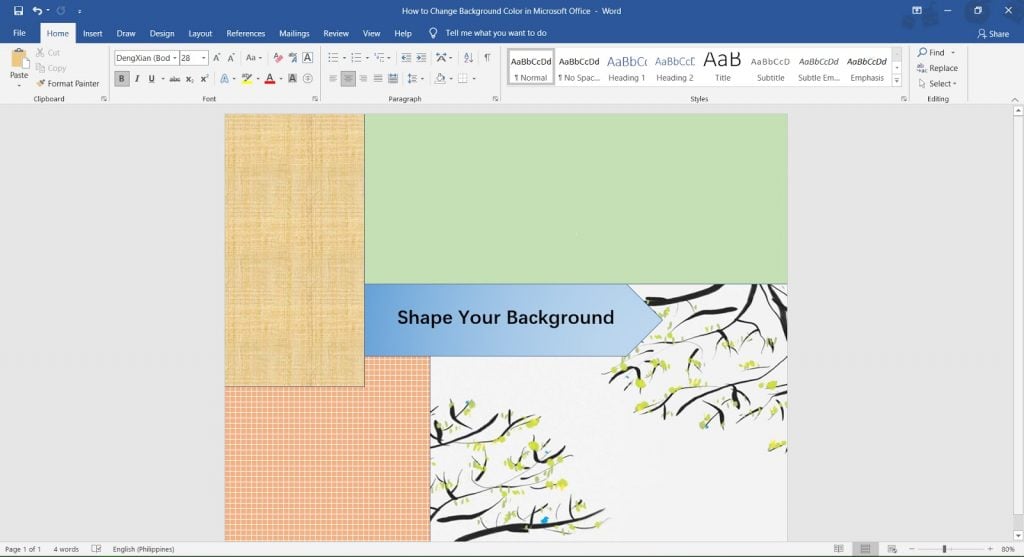
Shape your Background
All the methods explored in this guide, so far, all apply directly to the unabridged certificate. Do you want to be able to control where yous put a pattern, texture, color or motion-picture show? Do you want to have the flexibility to give every page a different background? If yous do, and so this is the guide for yous.
Shape your background past inserting shapes onto your page. Everything covered above can be applied to private shapes. Let usa show you how.
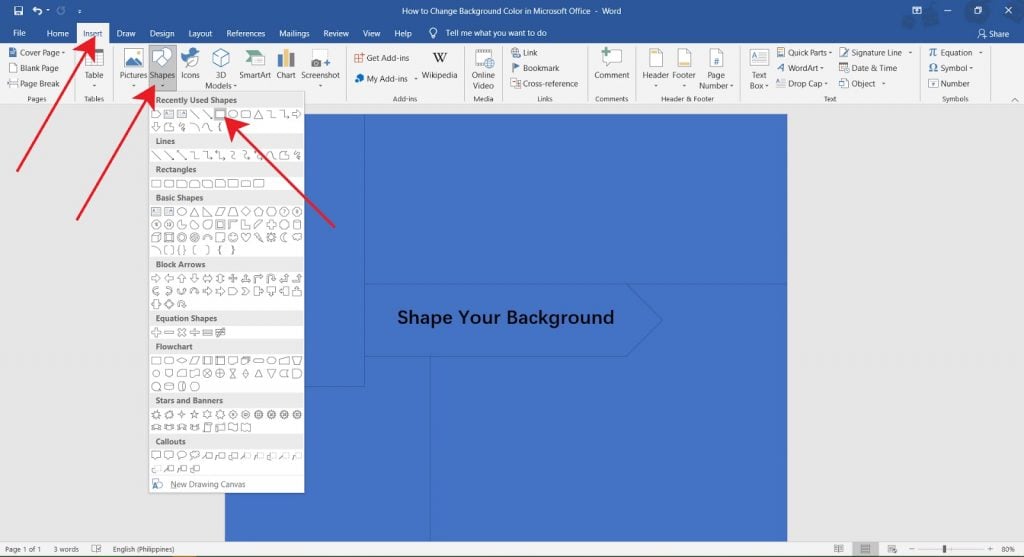
Add your Shapes and Lay them Out on the Folio
The first thing yous want to do is insert all the shapes you lot'll need. To practise that, become to the Insert tab on the Ribbon. One time that'south open, click on Shapes, and choose the shape you want to utilise. To make a shape, click and drag your mouse. It doesn't take to exist perfect on the starting time become. You can alter the dimensions of your shape anytime. Also, don't fret if you already have texts on the page that are being covered by the shapes. We will address that side by side.
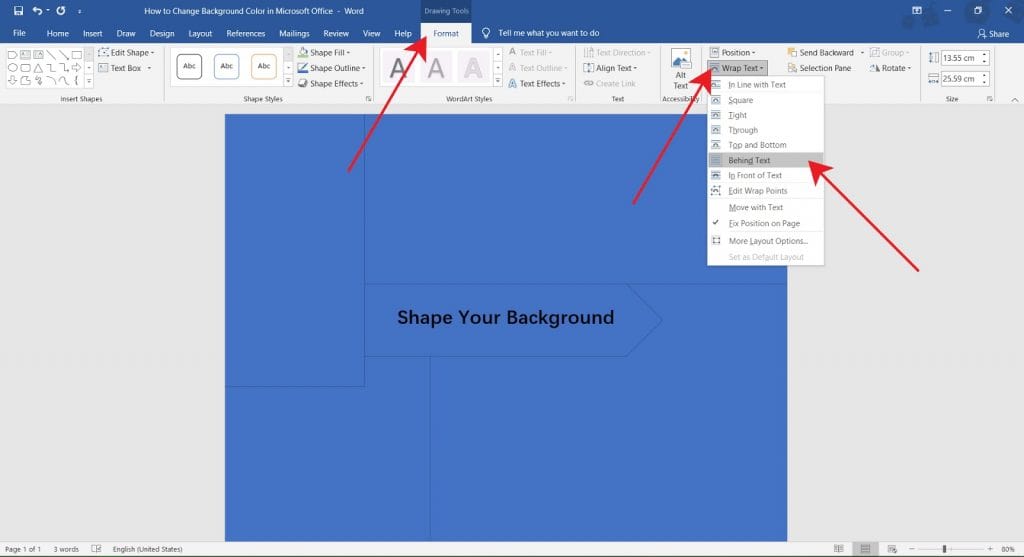
Wrap Text
This is an important step. Doing this will ensure that the shapes stay in their place backside the text. Take note that y'all do this pace for every shape on your page.
Showtime past selecting a shape. Once y'all do, a new tab appears on the Ribbon. Click on Drawing Tools Format. Expect for Wrap Text and click on it to open the drop-down menu. Select Backside Text. This moves the shape behind any texts on your page. It also keeps them in identify regardless of what else you lot type.
Echo this step for every shape on the folio.
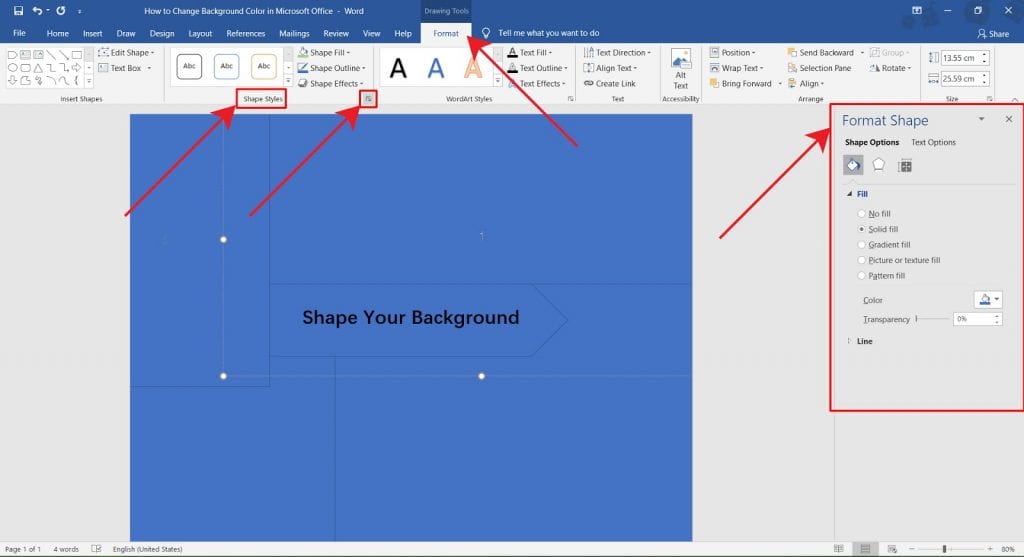
Decorate your Shapes
This is where you apply everything you lot've learned thus far, Solid Colors, Gradients, Textures, Patterns and Pictures. At that place are small-scale changes, only the steps are generally the aforementioned.
Start by selecting a shape. Become to the Cartoon Tools Format. Await for the portion of the ribbon that's labeled Shape Styles. In that location should be a small-scale symbol on the lower right corner that looks similar two ends of an arrow. Click it to open the Format Shapes bill of fare. One time you have that opened, you can decorate any shape as yous please.
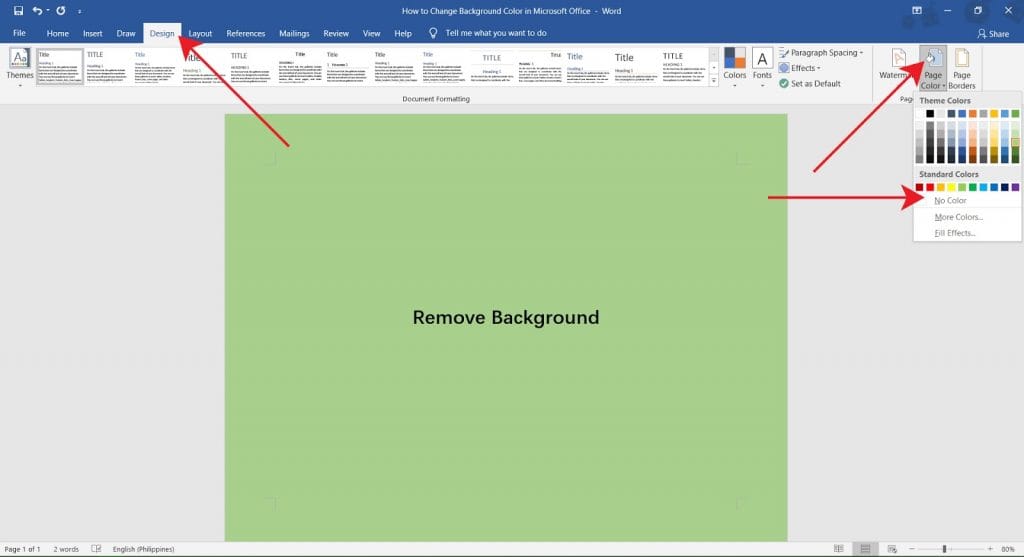
Remove the Background Color
If, after trying all these backgrounds, you decide to go back to the default, white, background color. Don't worry. This is, past far, the easiest guide here, and you lot'll have that clean groundwork again in no time!
Starting time, go to your Design tab. Click on Page Colour to open up the colors carte du jour, and click on No Color.
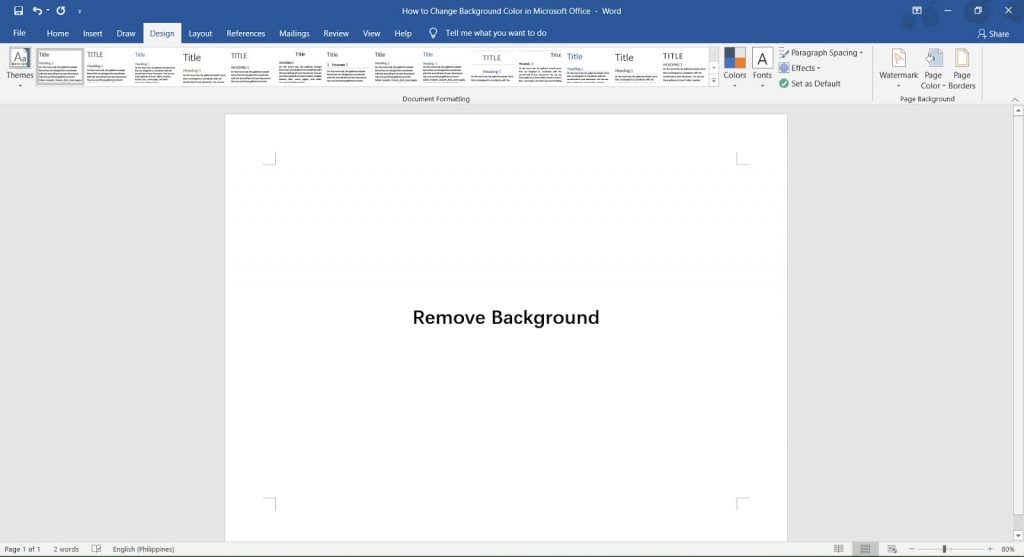
And you lot're washed! You've successfully removed all designs from your background and are dorsum to your default white!
Conclusion
You take finally arrived at the terminate of this guide. We promise that we've helped you larn how to add some color and pattern to your MS Word certificate.
We promise you establish this article helpful!
Source: https://officebeginner.com/msword/how-to-change-background-color-in-ms-word/
Posted by: pearsonpron1951.blogspot.com
0 Response to "How To Change The Color Of A Word Document"
Post a Comment