

How To Do A Timeline In Word
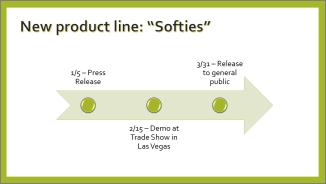
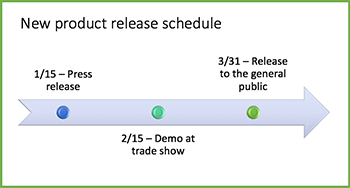
If you desire to create a graphical representation of a sequence of events, such equally the milestones in a project or the main events of a person's life, you lot can use a SmartArt graphic timeline. Subsequently you create the timeline, you can add more dates, move dates, modify layouts and colors, and utilize different styles.
Create a timeline
-
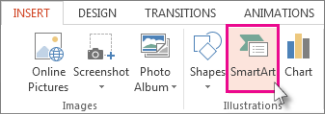
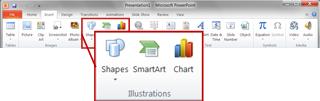
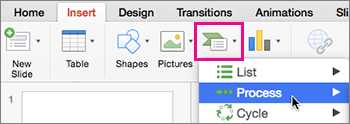
On the Insert tab, click SmartArt.
-
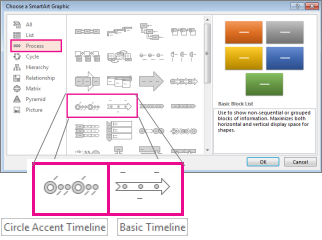
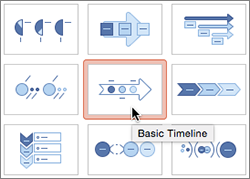
In the Choose a SmartArt Graphic gallery, click Process, and then double-click a timeline layout.
Tip:There are two timeline SmartArt graphics: Basic timeline and Circle Accent Timeline, but yous can likewise use almost any process-related SmartArt graphic.
-
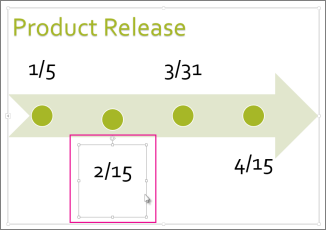
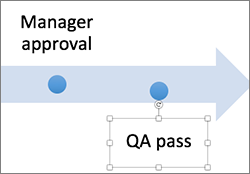
Click [Text], and and so blazon or paste your text in the SmartArt graphic.
Note:You lot can too open the Text Pane and blazon your text at that place. If you do not see the Text Pane, on the SmartArt Tools Blueprint tab, click Text Pane.
-
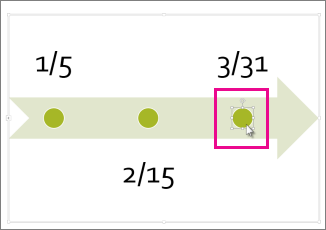
Click a shape in the timeline.
-
On the SmartArt Tools Design tab, do i of the following:
-
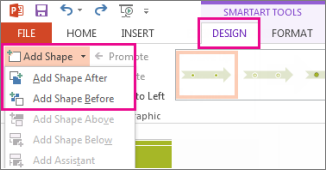
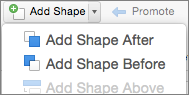
To add an earlier date, click Add Shape, and so click Add together Shape Before.
-
To add a later on appointment, click Add Shape, and then click Add together Shape After.
-
-
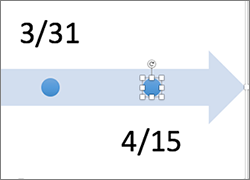
In the new date box, type the engagement that you lot want.
-
On the timeline, click the date yous want to move.
-
On the SmartArt Tools Blueprint tab, do ane of the following:
-
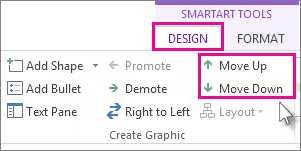
To move a date sooner than the selected appointment, click Move Up.
-
-
To move a date afterwards than the selected date, click Move Down.
-
Click the SmartArt graphic timeline.
-
On the SmartArt Tools Pattern tab, in the Layouts group, click More than
 .
.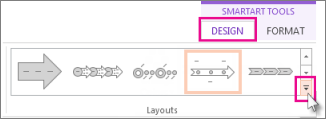
Note:To view merely the timeline and process-related layouts, at the bottom of the layouts list, click More Layouts, and so click Procedure.
-
Choice a timeline or process-related SmartArt graphic, similar the following:
-
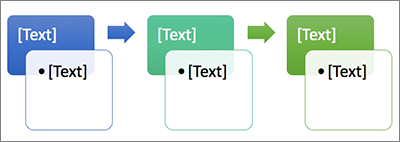
To show progression in a timeline, click Accent Process.
-
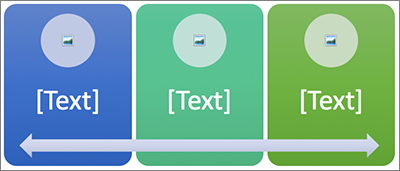
To create a timeline with pictures or photos, click Continuous Picture List. The circular shapes are designed to contain pictures.
-
-
Click the SmartArt graphic timeline.
-
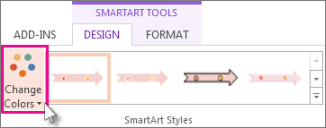
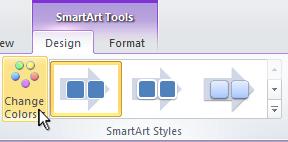
On the SmartArt Tools Design tab, click Change Colors.
Note:If y'all don't see the SmartArt Tools Pattern tab, make sure you've selected the timeline.
-
Click the colour combination that you want.
Tip:Place your pointer over any combination to see a preview of how the colors expect in your timeline.
A SmartArt mode applies a combination of effects, such equally line style, bevel, or three-D perspective, in one click, to give your timeline a professionally polished await.
-
Click the timeline.
-
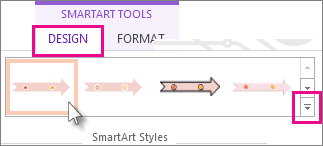
On the SmartArt Tools Design tab, click the way you want.
Tip:For more styles, click More
, in the lower right corner of the Styles box.
See also
-
Create a timeline in Visio
-
Import and export timeline data between Visio and Projection
-
Create a timeline in Projection
-
Get Microsoft timeline templates
Create a timeline
-
On the Insert tab, in the Illustrations group, click SmartArt.
-
In the Choose a SmartArt Graphic gallery, click Process, and and then double-click a timeline layout (such equally Basic Timeline).
-
To enter your text, do one of the following:
-
Click [Text] in the Text pane, and then type your text.
-
Copy text from another location or program, click [Text] in the Text pane, and then paste your text.
Annotation:If the Text pane is not visible, click the control.
-
Click in an entry in the SmartArt graphic, and so blazon your text.
Annotation:For all-time results, apply this option after y'all add all of the entries that yous want.
-
Other timeline tasks
-
Click the SmartArt graphic that you want to add another entry to.
-
Click the existing entry that is located closest to where you lot want to add the new entry.
-
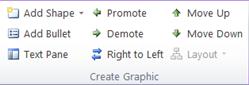
Nether SmartArt Tools, on the Pattern tab, in the Create Graphic grouping, click the arrow adjacent to Add Shape.
If you don't see the SmartArt Tools or Design tabs, make certain that you lot've selected the SmartArt graphic. You might accept to double-click the SmartArt graphic to open the Design tab.
-
Do one of the following:
-
To insert an entry after the selected entry, click Add Shape Afterward.
-
To insert an entry before the selected entry, click Add Shape Before.
-
To delete an entry from your timeline, exercise one of the post-obit:
-
In the SmartArt graphic, select the text for the textbox for the entry that yous want to delete, and and then press DELETE.
-
In the Text pane, select the all of the text for the entry that you want to delete, and then printing DELETE.
Notes:
-
To add a shape from the Text pane:
-
At the shape level, place your cursor at the cease of the text where you lot want to add a new shape.
-
Printing ENTER, and then type the text that yous desire in your new shape.
-
-
-
In the text pane, select the entry that y'all want to motion.
-
Do one of the following:
-
To move the entry to an earlier date, nether SmartArt Tools, on the Design tab, in the Create Graphic group, click Move Upward.
-
To move the entry to a later date, nether SmartArt Tools, on the Pattern tab, in the Create Graphic grouping, click Move Down.
If you don't see the SmartArt Tools or Design tabs, brand sure that yous've selected the SmartArt graphic. You lot might have to double-click the SmartArt graphic to open the Design tab.
-
-
Correct-click the timeline that you want to change, and and so click Change Layout.
-
Click Procedure, then exercise one of the post-obit:
-
For a unproblematic only effective timeline, click Basic Timeline.
-
To show a progression, a timeline, or sequential steps in a task, procedure, or workflow, click Accent Procedure.
-
To illustrate a timeline with pictures or photos, click Continuous Picture show List. The circular shapes are designed to contain pictures.
-
Notation:You can also change the layout of your SmartArt graphic past clicking a layout option in the Layouts group on the Blueprint tab under SmartArt Tools. When yous point to a layout pick, your SmartArt graphic changes to show yous a preview of how it would await with that layout.
To quickly add a designer-quality wait and polish to your SmartArt graphic, yous can modify the colors or apply a style to your timeline. You tin can as well add effects, such as glows, soft edges, or iii-D effects. Using Microsoft PowerPoint 2010, you lot can also animate your timeline.
You lot can apply color combinations that are derived from the theme colors to the entries in your SmartArt graphic.
-
Click the SmartArt graphic whose colour you want to change.
-
Nether SmartArt Tools, on the Blueprint tab, in the SmartArt Styles group, click Change Colors.
If you don't run into the SmartArt Tools or Design tabs, make sure that y'all've selected the SmartArt graphic.
-
Click the color combination that y'all desire.
Tip:When yous identify your pointer over a thumbnail, you can come across how the colors touch your SmartArt graphic.
-
In the SmartArt graphic, right-click the border of the entry you want to change, and and so click Format Shape.
-
To change the color of the entry's border, click Line Color, click Color
 , and then click the color that you desire.
 -
To change the fashion of the entry's border, click Line Mode, and then choose the line styles yous want.
-
Click the SmartArt graphic you want to alter.
-
Right-click the border of an entry, and and then click Format Shape.
-
Click Fill, and then click Solid fill.
-
Click Colour
, and and then click the color that you desire.
To modify the background to a colour that is not in the theme colors, click More Colors, and then either click the colour that yous desire on the Standard tab, or mix your own color on the Custom tab. Custom colors and colors on the Standard tab are not updated if you later on change the certificate theme.
To specify how much you lot tin come across through the background color, move the Transparency slider, or enter a number in the box next to the slider. You tin can vary the percentage of transparency from 0% (fully opaque, the default setting) to 100% (fully transparent).
A SmartArt Fashion is a combination of various effects, such as line style, bevel, or iii-D perspective that you can utilize to the entries in your SmartArt graphic to create a unique and professionally-designed expect.
-
Click the SmartArt graphic yous desire to alter.
-
Under SmartArt Tools, on the Pattern tab, in the SmartArt Styles group, click the SmartArt Mode that you want.

To see more SmartArt Styles, click the More push
 .
.
Note:When you place your pointer over a thumbnail, you lot tin can meet how the SmartArt Style affects your SmartArt graphic.
See also
-
Create a timeline in Visio
-
Import and export timeline data between Visio and Projection
-
Create a timeline in Project
Create a timeline
-
On the Insert tab, in the Illustrations group, click SmartArt.
-
In the Choose a SmartArt Graphic gallery, click Process, and and so double-click a timeline layout (such as Bones Timeline).
-
To enter your text, practice one of the post-obit:
-
Click [Text] in the Text pane, and then type your text.
-
Copy text from some other location or plan, click [Text] in the Text pane, and then paste your text.
Note:If the Text pane is not visible, click the control.
-
Click in an entry in the SmartArt graphic, and and so type your text.
Note:For best results, use this choice after you add all of the entries that you want.
-
Other timeline tasks
-
Click the SmartArt graphic that you lot desire to add some other entry to.
-
Click the existing entry that is located closest to where you lot want to add the new entry.
-
Under SmartArt Tools, on the Design tab, in the Create Graphic grouping, click the arrow under Add Shape.
If you don't see the SmartArt Tools or Design tabs, make sure that you've selected the SmartArt graphic.
-
Practice 1 of the post-obit:
-
To insert an entry after the selected entry, click Add together Shape Subsequently.
-
To insert an entry before the selected entry, click Add Shape Earlier.
-
To delete an entry from your timeline, click the entry you desire to delete, and then press DELETE.
Notes:
-
To add a shape from the Text pane:
-
At the shape level, place your cursor at the end of the text where you desire to add a new shape.
-
Press ENTER, and then type the text that you lot want in your new shape.
-
To add together an assistant box, press ENTER while an assistant box is selected in the Text pane.
-
-
To motility an entry, click the entry, and then drag it to its new location.
-
To move an entry in very small increments, hold down CTRL while you press the arrow keys on your keyboard.
-
Correct-click the timeline that you want to modify, and then click Change Layout.
-
Click Process, and then do one of the following:
-
For a simple but effective timeline, click Bones Timeline.
-
To show a progression, a timeline, or sequential steps in a job, process, or workflow, click Accent Process.
-
To illustrate a timeline with pictures or photos, click Continuous Movie List. The circular shapes are designed to incorporate pictures.
-
Annotation:You lot tin likewise change the layout of your SmartArt graphic past clicking a layout pick in the Layouts group on the Pattern tab under SmartArt Tools. When you bespeak to a layout option, your SmartArt graphic changes to evidence you a preview of how information technology would look with that layout.
To apace add a designer-quality wait and smoothen to your SmartArt graphic, you can alter the colors or apply a SmartArt Manner to your timeline. You lot tin also add effects, such every bit glows, soft edges, or 3-D furnishings. Using PowerPoint 2007 presentations, y'all can animate your timeline.
You tin can apply color combinations that are derived from the theme colors to the entries in your SmartArt graphic.
-
Click the SmartArt graphic whose colour y'all desire to change.
-
Under SmartArt Tools, on the Design tab, in the SmartArt Styles group, click Change Colors.

If you don't see the SmartArt Tools or Design tabs, make sure that you've selected the SmartArt graphic.
-
Click the color combination that you lot want.
Tip:When you place your pointer over a thumbnail, y'all can see how the colors affect your SmartArt graphic.
-
In the SmartArt graphic, right-click the border of the entry you want to change, and then click Format Shape.
-
To change the color of the entry'southward edge, click Line Color, click Color
, and then click the color that y'all want. -
To change the style of the entry's edge, click Line Style, and and then cull the line styles you want.
-
Click the SmartArt graphic you want to change.
-
Right-click the border of an entry, and and so click Format Shape.
-
Click Fill, and and so click Solid fill.
-
Click Colour
, and then click the color that you want.
To change the background to a color that is non in the theme colors, click More Colors, and then either click the color that y'all want on the Standard tab, or mix your own color on the Custom tab. Custom colors and colors on the Standard tab are not updated if you later modify the document theme.
To specify how much yous tin see through the background color, motion the Transparency slider, or enter a number in the box side by side to the slider. You can vary the percentage of transparency from 0% (fully opaque, the default setting) to 100% (fully transparent).
A SmartArt Style is a combination of various furnishings, such as line way, bevel, or 3-D, that you can utilize to the entries in your SmartArt graphic to create a unique and professionally designed look.
-
Click the SmartArt graphic you want to alter.
-
Under SmartArt Tools, on the Design tab, in the SmartArt Styles grouping, click the SmartArt Style that you want.
To see more SmartArt Styles, click the More button
.
-
When you place your pointer over a thumbnail, y'all can meet how the SmartArt Manner affects your SmartArt graphic.
-
You can besides customize your SmartArt graphic by moving entries, resizing entries, adding a fill or effect, and adding a moving-picture show.
If yous're using PowerPoint 2007, you tin can animate your timeline to emphasize each entry.
-
Click the timeline that y'all want to breathing.
-
On the Animations tab, in the Animations group, click Animate, and and then click I by one.

Note:If you lot re-create a timeline that has an animation applied to it to another slide, the animation is also copied.
See also
-
Create a timeline in Visio
Create a timeline
When you want to prove a sequence of events, such as project milestones or events, you can use a SmartArt graphic timeline. Subsequently y'all create the timeline, you lot can add events, move events, change layouts and colors, and employ different styles.
-
On the Insert tab, click SmartArt > Process.
-
Click Basic Timeline or one of the other process-related graphics.
-
Click the [Text] placeholders and enter the details of your events.
Tip:You tin as well open the Text Pane and enter your text there. On the SmartArt Blueprint tab, click Text Pane.
-
Click a shape in the timeline.
-
On the SmartArt Design tab, click Add together Shape, and then click Add Shape Before or Add Shape After.
-
Enter the text yous want.
-
On the timeline, click the text of the issue you want to move.
-
On the SmartArt Design tab, click Move Up (left), or Move Down (right).

-
Click the timeline.
-
On the SmartArt Design tab, indicate to the layout console and click the down arrow.
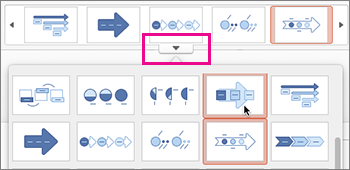
-
Selection a timeline or process-related SmartArt graphic, like the following:
-
To evidence progression in a timeline, click Accent Process.
-
To create a timeline with pictures or photos, click Continuous Movie List. The round shapes are designed to contain pictures.
-
-
Click the timeline.
-
On the SmartArt Design tab, click Change Colors, and so click the color combination you want.
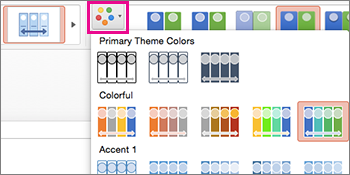
Give your timeline a professional look past using a SmartArt way to apply a combination of furnishings, such as line style, bevel, or 3-D perspective.
-
Click the timeline.
-
On the SmartArt Design tab, click the style you want.


How To Do A Timeline In Word,
Source: https://support.microsoft.com/en-us/office/create-a-timeline-9c4448a9-99c7-4b0e-8eff-0dcf535f223c
Posted by: pearsonpron1951.blogspot.com
0 Response to "How To Do A Timeline In Word"
Post a Comment